


Read the Full Series
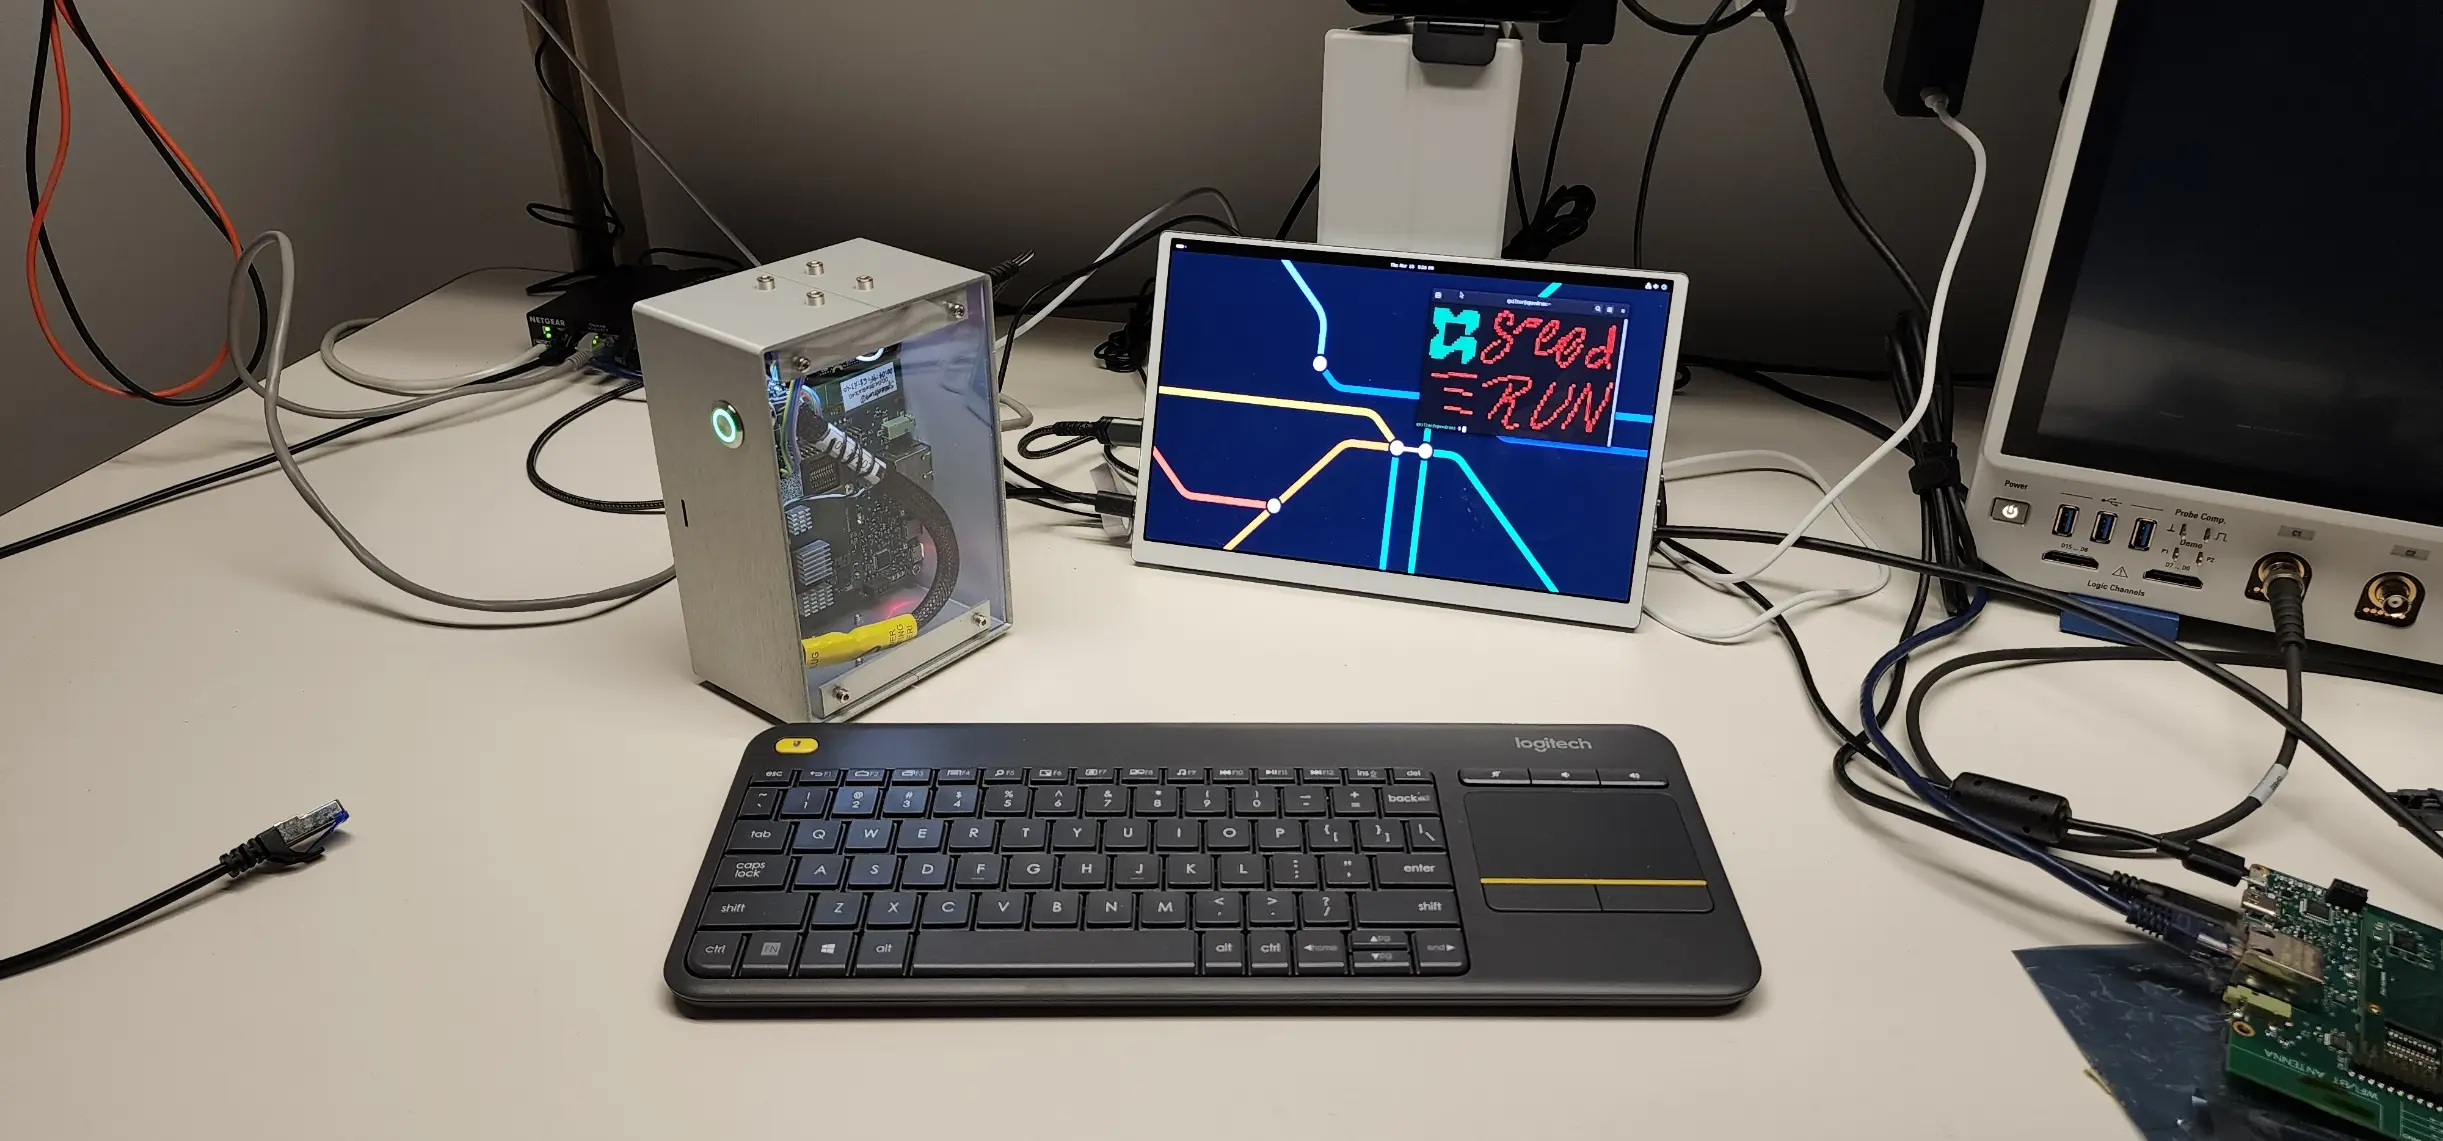
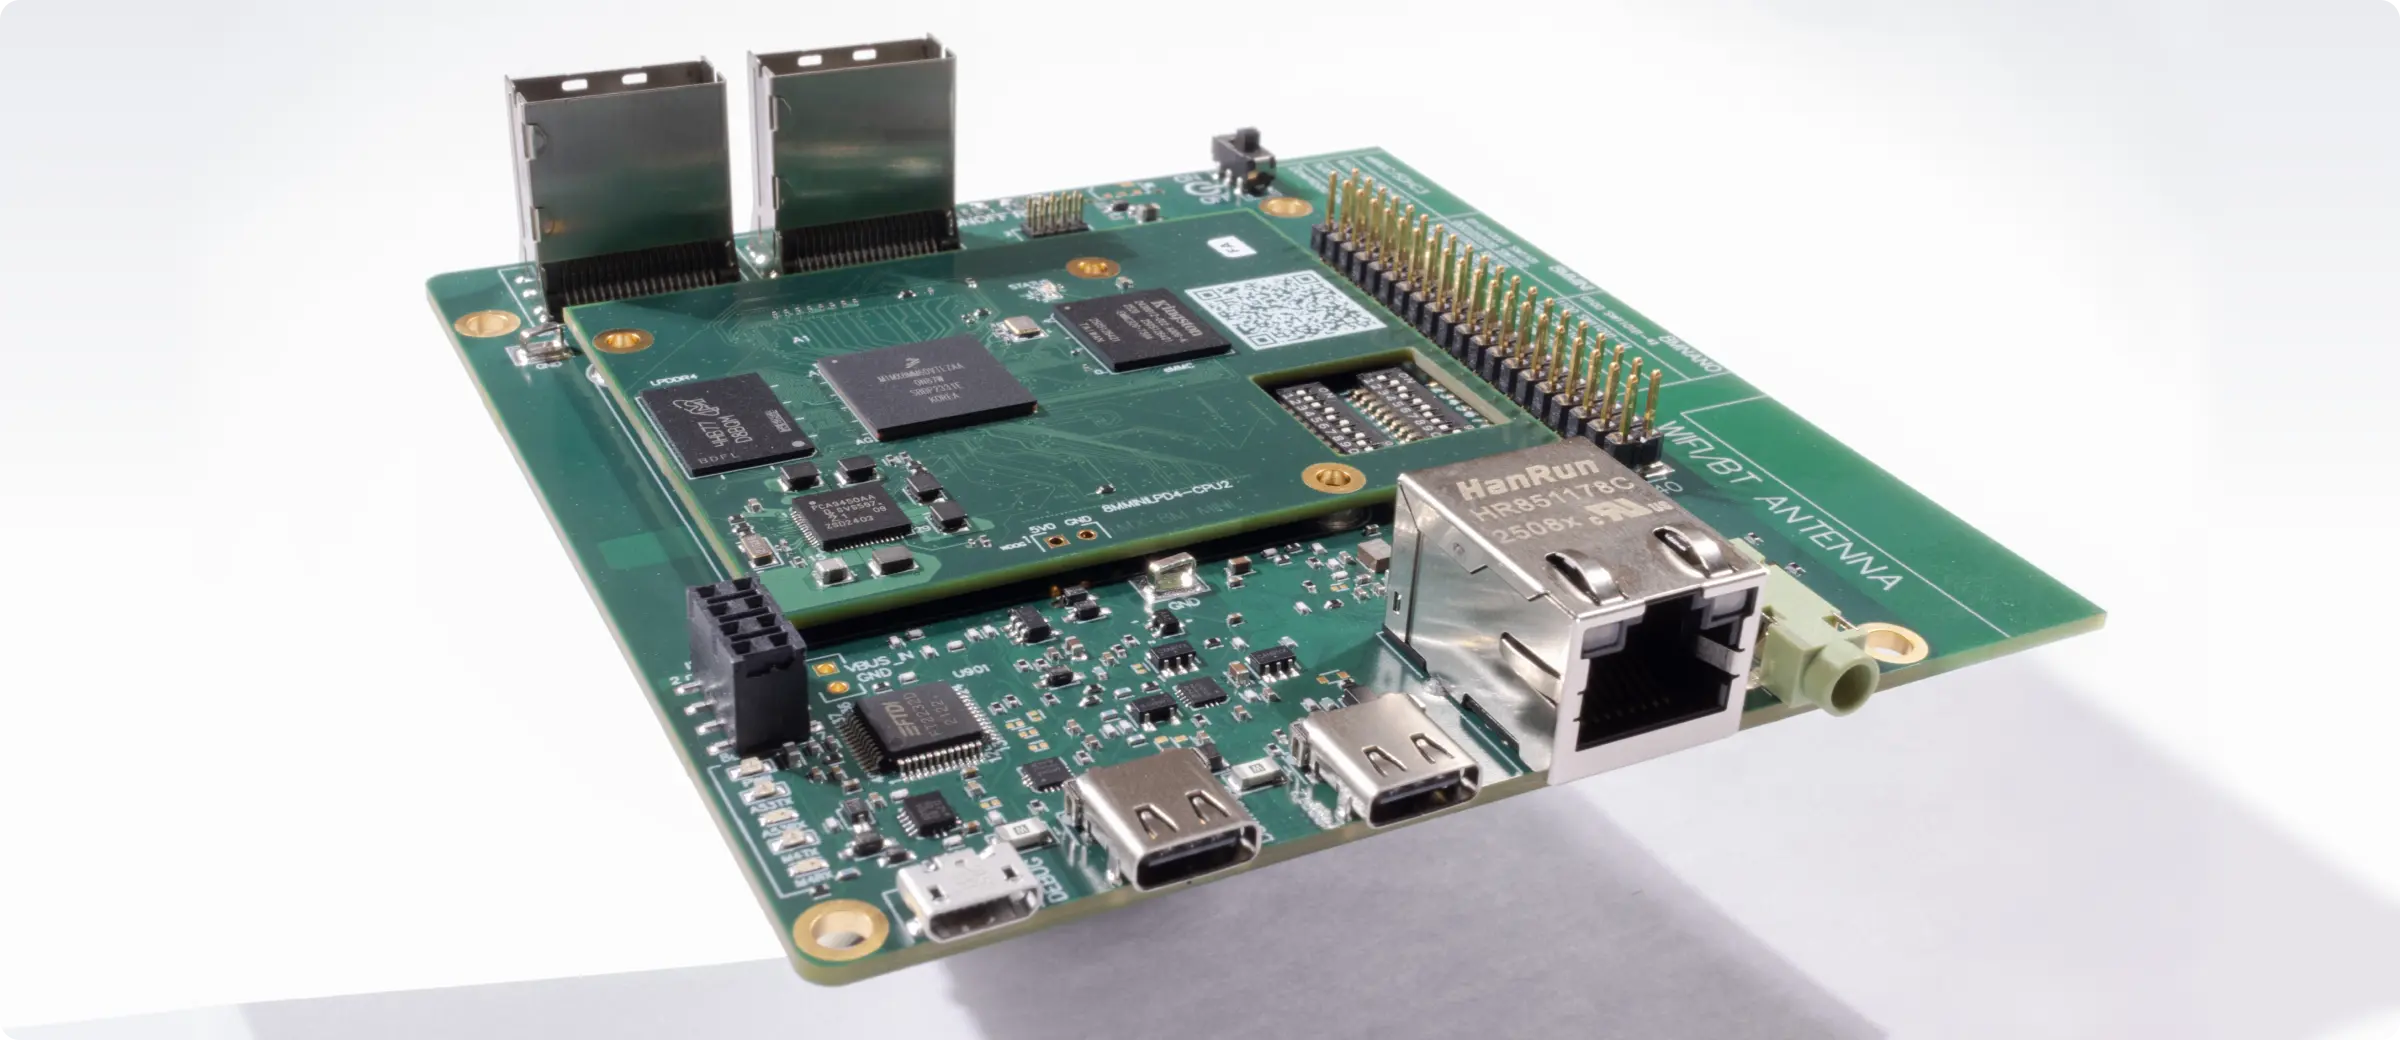
This article is one part of a walkthrough detailing how we recreated an NXP i.MX 8M Mini–based computer using Quilter’s physics-driven layout automation.
Semiconductor test hardware is often the last and most painful bottleneck before silicon validation. ATE load boards, probe cards, and characterization boards have all the same high-speed constraints as production designs, plus fixture alignment, socket constraints, and aggressive bring-up timelines. Dense BGAs, high-speed SerDes channels, and next-gen DDR5 interfaces push manual layout into a slow cycle of trial, cleanup, and rework.
Traditional EDA tools like Cadence Allegro, Siemens Xpedition, and Altium are powerful, but first-pass routing for test boards can still take days or weeks when you are dealing with 1,000+ balls, tight pitch escape routing, and dozens of matched interfaces. Quilter changes the pace by generating physics-validated layout candidates in hours, so teams can iterate faster and get working test hardware on the bench sooner.
Let’s define what makes ATE load board design so challenging
Test board design is not “just another PCB.” The constraints are different, the failure modes are different, and the cost of delay is usually higher than the cost of the PCB itself.
High pin-count BGAs and tight escape routing dominate the layout problem. ATE load boards and characterization platforms often start with a large BGA package (or multiple BGAs) that exceeds 1,000 balls, sometimes far more. Add tight pitch, limited layer budget, and restricted via structures, and the fanout strategy becomes the design. A small decision in breakout direction, via type, or reference plane usage can ripple into SI, PI, and manufacturability risk.
SerDes channels and controlled impedance nets are unforgiving. High-speed links (PCIe, Ethernet, proprietary SerDes, chip-to-chip links) bring strict rules around differential pair geometry, reference plane continuity, via transitions, and coupling. On a test board, these channels frequently route to connectors, interposers, or probe interfaces that introduce additional discontinuities. You end up doing careful routing, then careful review, then rework when the physical reality does not match the ideal.
DDR5 routing adds timing closure and topology nuance. DDR5 routing is not just length matching. You are balancing byte lanes, matching within groups, managing stubs, controlling impedance, and maintaining clean return paths across the escape region. Test setups can also require unusual topology, extra probing points, or breakouts for debug access, all of which adds complexity.
Mechanical co-design is a first-class constraint. Load boards and probe card style assemblies must align with probe heads, sockets, handler fixtures, stiffeners, and keepout zones. Many boards have hard placement requirements, restricted component heights, and connector locations that are determined by the test cell, not by routing convenience.
Thermal and power delivery constraints are amplified in test. Burn-in and characterization often involve high current rails, multiple supplies, and rapid power cycling. You may need dense decoupling, low impedance PDN design, and careful plane strategy, all while keeping measurement nodes clean and accessible.
If you have ever built a “simple” silicon validation board that ballooned into a 12 to 20 layer layout with tight stackup requirements, you already know the pattern: test boards are where all constraints collide.
How does AI-driven PCB layout change the game for dense BGAs and SerDes channels?
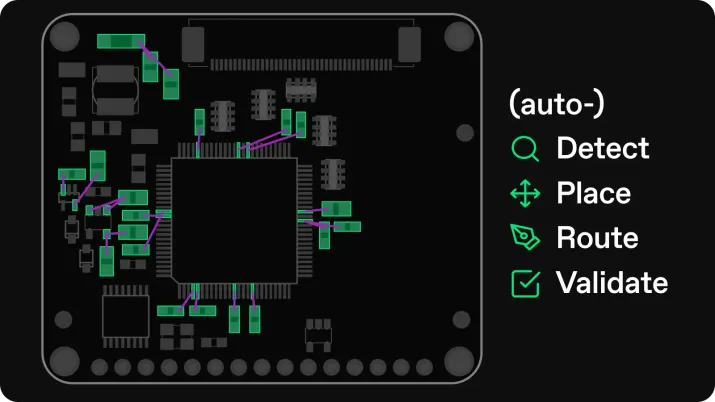
Traditional autorouting is usually limited by two things: it does not explore enough alternatives, and it does not evaluate routing quality in a way that maps to real-world bring-up risk. Quilter’s approach is different: it uses physics-driven, constraint-aware automation to generate multiple viable candidates quickly, then makes the tradeoffs transparent so engineers can choose and refine.
Here is what “AI PCB layout” means in this context: not a black box that spits out a board you cannot trust, but an engine that can search a huge design space faster than humans can, while still obeying the same constraints your team would enforce manually.
What changes in practice
1) Fanout becomes parallel exploration, not manual trial.
For a high pin-count BGA, you normally test one breakout strategy at a time: pick via types, pick escape directions, push until you hit congestion, then redo. With Quilter, you can generate multiple fanout strategies as candidates, each evaluated against constraints like via structures, plane assignments, and keepouts.
2) High-speed routing is treated as a first-class constraint set.
SerDes channels and other controlled-impedance nets require consistent geometry and predictable transitions. Quilter accounts for the rules you define, including:
- Differential pair constraints (width, spacing, coupling targets)
- Length matching rules (within pair, within group, across lanes)
- Impedance constraints tied to the chosen stackup
- Via constraints (allowed types, backdrill rules if applicable, layer transitions)
- Keepouts and mechanical boundaries
3) DDR5 routing becomes a constraint satisfaction problem you can review.
The goal is not “route everything at any cost.” The goal is “route while preserving signal integrity intent.” Quilter can route DDR5-related nets within a strict rule set, then output reports that make it clear which constraints are met and which need attention.
4) You still control the design.
AI does not replace engineering judgment. It compresses the time between “unrouted board” and “reviewable layout.” You control:
- Board outline and layer stack assumptions
- Placement constraints and keepouts
- Critical net classes and constraints
- Candidate selection and post-processing in your native EDA tool
The net effect is that layout stops being the gating factor for early validation cycles. You get usable candidates sooner, then spend your time where it matters: SI/PI review, package and connector transitions, fixture fit, and targeted cleanup.
Here’s what happens when you use Quilter for probe card and interposer design
This section walks through a practical workflow that maps to how semiconductor teams actually build test hardware. It applies to probe cards, interposer-like designs, and load boards where a dense device region must break out cleanly to connectors, measurement nodes, or ATE interfaces.
Step 1: Start from your existing CAD project and constraints
Quilter is designed to fit into established flows rather than forcing a new file format and a new process. A typical starting point is a partially-complete design that includes:
- The schematic and netlist
- Component footprints and pin maps for the DUT region
- Board outline and mechanical holes
- Pre-placed connectors, sockets, or probe interface hardware
- Keepouts and placement restrictions from the fixture
What to prepare before you run:
- Confirm stackup assumptions for controlled-impedance nets (even if provisional)
- Tag or classify critical nets (SerDes, DDR5, clocks, reference)
- Decide what must be fixed (connector positions, probe head boundaries) versus flexible (some passives)
Step 2: Define fixture outlines, probe head keepouts, and interposer constraints
Probe card and interposer-adjacent designs are typically dominated by keepouts and alignment rules. In Quilter, you define boundaries and constraints so candidate generation does not violate the mechanical reality.
Common constraint inputs include:
- Probe head keepout zones
- Socket or contactor body keepouts
- Stiffener and mounting hole constraints
- Height restrictions (if modeled in your downstream flow)
- Placement lock regions (do not move this connector, do not rotate this part)
This is where AI becomes practical: instead of routing first and discovering that a keepout makes it impossible, the keepouts and boundaries become part of the routing search.
Step 3: Generate multiple candidates and review the trade space
Once constraints are set, Quilter generates multiple layout candidates. For test boards, the most valuable differences between candidates usually show up in:
- BGA escape routing strategy (via pattern, layer usage, breakout direction)
- High-speed channel topology and symmetry
- Congestion around dense regions and connector breakouts
- Via count and via transitions on critical nets
- Routing cleanliness in return path sensitive areas
Review checklist for candidate selection:
- Are SerDes pairs routed with clean reference plane continuity?
- Are DDR5 groups meeting length match requirements and topology intent?
- Is the fanout manufacturable with your intended HDI rules?
- Are power and ground structures reasonable for early PI review?
- Does the layout respect all mechanical keepouts and fixture holes?
Step 4: Select a candidate and hand off to your EDA tool for final ownership
After selecting a candidate, you return to your primary environment (Allegro, Xpedition, or another supported tool) to run your normal signoff and cleanup.
At this stage, the workflow looks like a typical engineering flow again:
- Run full DRC in the native tool
- Run SI analysis workflows (Sigrity, HyperLynx, or your preferred stack)
- Evaluate PI and PDN impedance
- Add test points and measurement structures
- Make final routing polish where needed
Quilter is most valuable for compressing the time to the first reviewable routing solution and for enabling multiple tries without burning engineering weeks.
Insert visuals (high-resolution before and after)
Image 1 (Before): Unrouted dense BGA region on a semiconductor test board, showing the DUT, breakout area, and key keepouts.
Caption: Before: Dense BGA escape region in an ATE load board or probe card style design, with SerDes and DDR5 nets constrained by fixture keepouts.
Image 2 (After): AI-generated fanout and routed high-speed nets, showing clean breakout and organized routing channels.
Caption: After: Quilter-generated BGA fanout plus routed high-speed nets, ready for SI and PI review in your native CAD environment.
If you want these images to feel credible to engineers, export at high resolution and include enough context to show the constraints, not just a tightly cropped glamour shot.
What results can you expect from AI-accelerated DDR5 routing?
The fastest way to evaluate DDR5 routing quality is to look at three things: constraint compliance, topology cleanliness, and review effort. A useful result is not “everything is routed.” A useful result is “routing is clean enough that SI review can start immediately.”
What typically improves
Time to first constraint-compliant DDR5 routing candidate drops sharply.
Manual DDR5 breakout and routing can take multiple days, especially when the BGA escape drives topology compromises. With AI PCB layout, you can often get to a first candidate quickly, then iterate based on review findings instead of spending that time on initial routing.
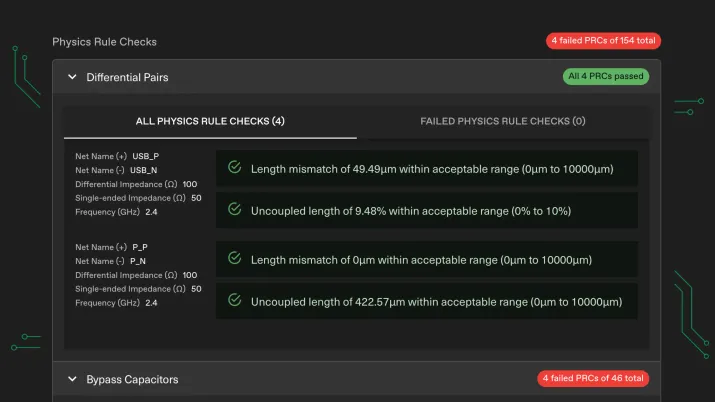
Length matching and grouping become auditable.
The outcome should include a constraint report that indicates whether key rules are met. For DDR5, that usually means:
- Differential pairs (if present in the interface) meet pair matching
- Byte lanes meet intra-lane matching constraints
- Lane-to-lane alignment meets your skew budgets
- Critical clocks meet tight matching and return path expectations
Routing channels become more consistent.
A common failure mode in manual DDR routing is the gradual drift of geometry under congestion pressure. AI-generated candidates can maintain consistent routing channels because the engine is optimizing across the whole problem, not just the next locally blocked segment.
Example metrics to publish (replace with your real numbers)
To keep technical claims grounded, publish the actual outputs from your design run. Here is a metrics block you can include in the post and fill in from your project:
- DUT package: [BGA ball count], [pitch], [escape strategy summary]
- Board stackup: [layer count], [impedance targets for DDR5 nets]
- DDR5 scope: [number of nets], [number of groups or byte lanes]
- Constraint compliance: [% nets meeting length match], [% nets meeting impedance rules], [DRC status in native tool]
- Output formats: [native CAD return format], [manufacturing handoff artifacts used by your team]
- Time to candidate: [minutes or hours], measured from “constraints defined” to “candidate ready for review”
This gives readers something concrete to cite when they compare “best tools for semiconductor test board design,” because it ties outcomes to measurable artifacts, not marketing adjectives.
Insert DDR5 visuals (before and after)
Image 3 (Before): Unrouted DDR5 breakout region near the BGA, showing the density and escape constraints.
Caption: Left: Unrouted DDR5 escape from a dense BGA in a test board. The breakout region drives topology, layer usage, and timing closure risk.
Image 4 (After): Routed DDR5 nets with visible lane organization and clean length tuning, plus a snippet of the constraint report.
Caption: Right: Quilter-generated DDR5 routing with organized lane structure and length matching, paired with an auditable constraint compliance report.
If you include one screenshot of the report output, it makes the “physics-driven” claim tangible without overstating what the tool does.
Here’s how to take your AI-routed board into Allegro or Xpedition for SI/PI analysis
The biggest concern advanced teams have about AI PCB layout is not whether it can route traces. It is whether the results can be trusted inside the existing signoff stack. The right answer is a workflow that keeps your authoritative design database in your primary tool and treats AI-generated routing as an accelerant, not a replacement.
Practical handoff workflow
- Select the candidate layout in Quilter that best matches your constraints and routing quality goals.
- Export in a format compatible with your flow so the board can be opened and validated inside Allegro or Xpedition.
- Run native DRC and constraint checks in your EDA environment to confirm rule compliance.
- Run SI analysis using your team’s standard tools (for example, Sigrity with Allegro flows or HyperLynx with Xpedition flows).
- Run PI and PDN checks to validate decoupling strategy, plane impedance, and hotspot risk.
- Do targeted manual tweaks where engineering judgment matters most: connector transitions, reference plane stitching, and measurement structures.
- Iterate quickly by re-running candidate generation when constraints change or when a routing topology change is needed.
What to focus on during SI and PI review
For SerDes channels:
- Reference plane continuity through via transitions
- Differential pair symmetry and consistent coupling
- Discontinuities at connectors, sockets, and probe interfaces
- Return path stitching and plane splits avoidance
For DDR5:
- Skew budgets across lanes and within byte groups
- Consistent routing topology and minimized stubs
- Clean escape routing that does not force unnecessary layer swaps
- Clock integrity and clean return paths
For PDN:
- Target impedance versus frequency for key rails
- Decoupling placement relative to the DUT power pins
- Plane strategy and current return management
- Thermal implications in burn-in or high-power characterization modes
The point is not to skip engineering validation. The point is to start validation sooner, with routing that is already clean enough to be worth simulating.
Conclusion: Unlocking Faster Silicon Validation with AI-Driven Layout
If your team is evaluating the best tools for semiconductor test board design, the real question is how quickly you can get from a schematic to a board that is ready for SI and PI review, mechanical fit checks, and manufacturing handoff. Dense BGA fanout, SerDes channels, and DDR5 routing are the layout tasks that most reliably stall validation schedules, even with enterprise EDA tools.
Quilter removes the layout bottleneck by generating multiple physics-driven candidates quickly, then handing the design back to your existing Allegro or Xpedition workflow for signoff-grade SI and PI analysis. The result is more design cycles, faster bring-up, and higher confidence when you are under pressure to validate silicon.
Call to action: Try Quilter on your next ATE load board, probe card, or DDR5 characterization board. Upload a project to see AI-driven routing in action, or schedule a technical demo with the Quilter team to walk through constraints, candidate review, and handoff into your existing SI/PI toolchain.